If you’re using CloudFlare to host your DNS, there is a plugin for the official Let’s Encrypt client Certbot you can use to easily acquire and renew wildcard certificates from Let’s Encrypt.
Note: This article has been changed to not use pip to install Certbot, but instead use the now available OS packages.
CloudFlare API credentials
Since we’re going to use CloudFlare’s DNS to verify our domain for Let’s Encrypt, we (or rather Certbot) will need to use CloudFlare’s API to create some verification DNS records on the fly.
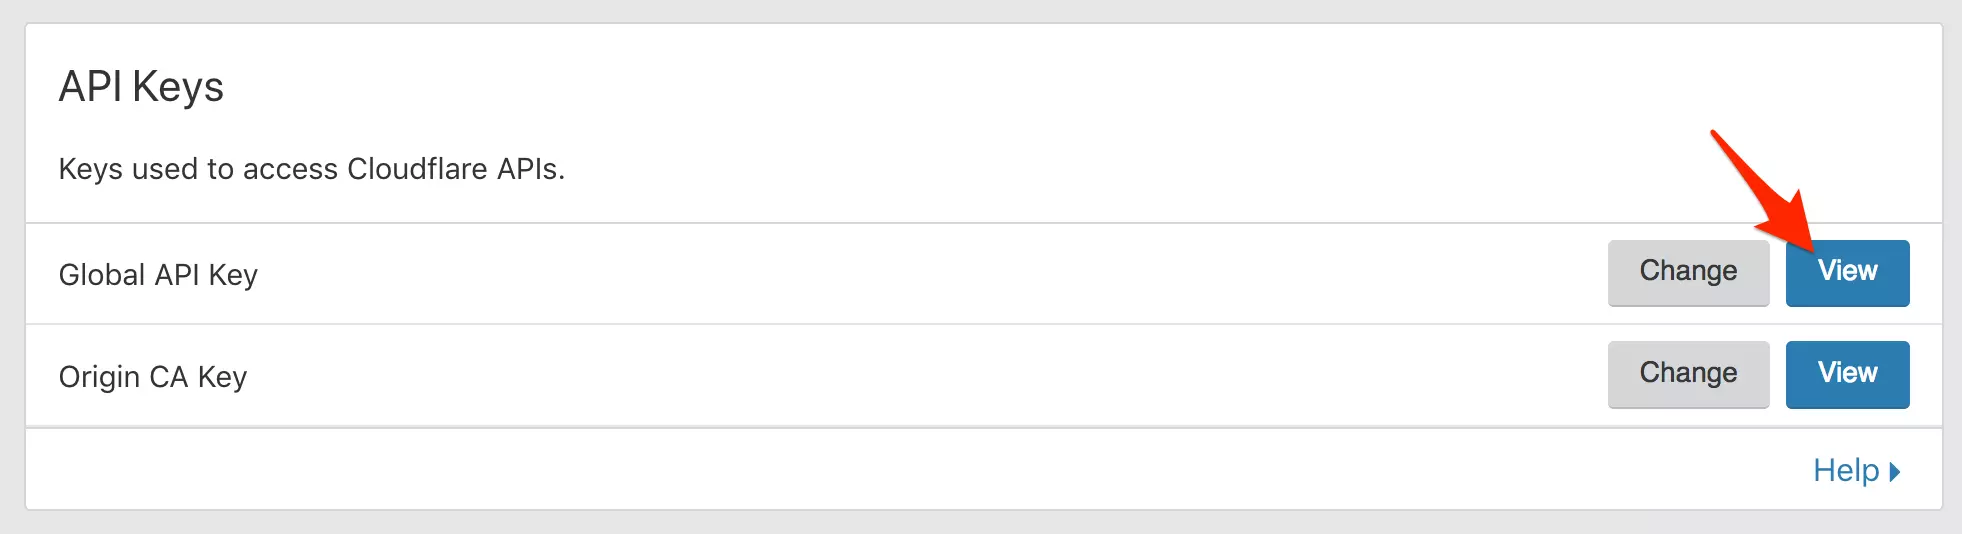
To get your API key, login to your CloudFlare dashboard, go to your profile and at the bottom, click “View” next to “Global API key”. The Certbot plugin doesn’t support using the API token authentication method.
Now, when you get the key and you see the warning “Protect this key like a password!” this is an understatement. If you follow best practices, you have secured your CloudFlare account with two factor verification. Now, this API key is even more powerful than a password, as anyone using it doesn’t have to use two factor authentication. The email address associated with the account and this API key is all that is needed. Protect this key even better than your passwords!
Now store your credentials on your server, in a file that is readable by root only. I always store them in a file with a name that is logic to me, that these are secret credentials for CloudFlare, accessible by root only, namely:
/root/.secrets/cloudflare.ini
The directory should only be accessible by root:
$ sudo chmod 0700 /root/.secrets/
And the file too:
$ sudo chmod 0400 /root/.secrets/cloudflare.ini
The content will look somewhat like this. Replace the email address with your account email address, and the API key with the one you viewed in the CloudFlare admin panel earlier.
dns_cloudflare_email = "[email protected]"
dns_cloudflare_api_key = "4003c330b45f4fbcab420eaf66b49c5cbcab4"
Install Certbot and the CloudFlare DNS authenticator plugin
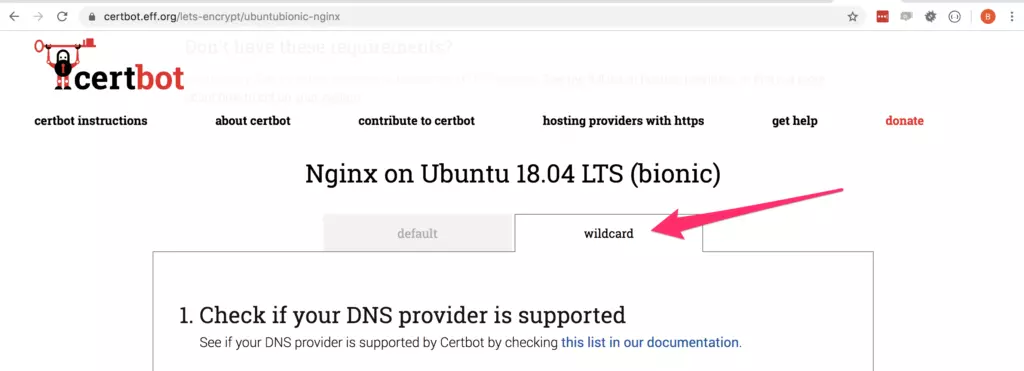
EFF now has a very nice official guide on how to install both Certbot and plugins on the site https://certbot.eff.org/instructions
If you follow the instructions on the EFF site, make sure you select the “wildcard” tab, to get the installation instructions for the DNS authenticator plugin as well.
Here are the instructions if you’re using Ubuntu:
$ sudo apt-get update
$ sudo apt-get install software-properties-common
$ sudo add-apt-repository universe
$ sudo add-apt-repository ppa:certbot/certbot
$ sudo apt-get update
$ sudo apt-get install certbot python-certbot-nginx python3-certbot-dns-cloudflare
If you are running a different Linux distribution, use the Certbot installtion guide mentioned above.
Now you should have Certbot installed in /usr/bin/certbot, and have the CloudFlare DNS Authenticator plugin installed and activated along with it. Smooth, huh?
Run Certbot with the CloudFlare Authenticator
Now, getting a new wildcard is as simple as running:
$ sudo certbot certonly --dns-cloudflare --dns-cloudflare-credentials /root/.secrets/cloudflare.ini -d example.com,*.example.com --preferred-challenges dns-01
This should fetch a new wildcard certificate for you for *.example.com and store it in /etc/letsencrypt/live/example.com/fullchain.pem
`` Automatic renewals
Now, if you run certbot renew, your certificate should be renewed if it is time to do so. This will be done using the secret credentials you saved, so no interaction is needed. If you like, you can test it by providing the --dry-run argument like this:
$ certbot renew --dry-run
It might be a good idea to create a crontab entry like this:
14 5 * * * /usr/bin/certbot renew --quiet --post-hook "/usr/sbin/service nginx reload" > /dev/null 2>&1
Now your wildcard certificate will renew fully automatically without any interaction needed on your side.